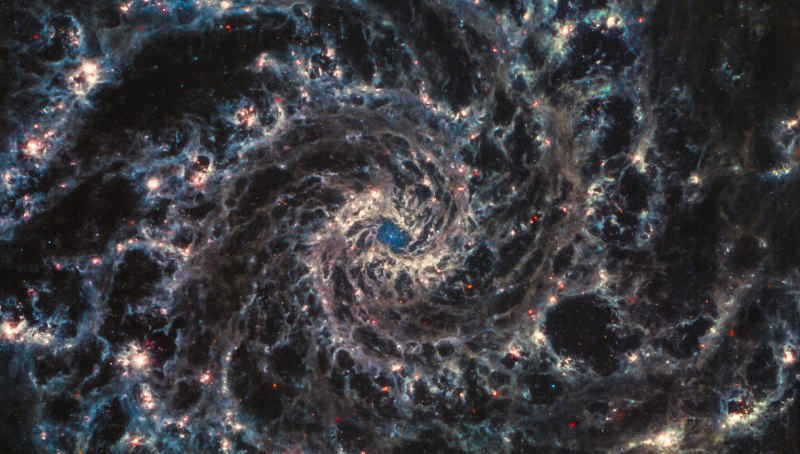
Since the beginning of time, man has looked up at the stars and wondered what was out there. With the right telescope, you don’t have to wonder. You’ll have visual access to an entire sea of stars and sometimes planets.
How much you get to see depends on what kind of telescope you have and how you use it. If you don’t adjust your lenses the right way, the most you’ll see is a few twinkling stars.
We can teach you how to use telescopes to go beyond that. Check out this guide to learn how to make the most out of your new telescope.
Types of Telescopes
Before you begin trying to gaze at the stars and planets, it helps that you choose the right telescope for the job. There are three major types on the market that you can pick from. The best one for you will depend on what you’re trying to see.
Refractor
Refractor telescopes are essentially a long tube that houses a lens that collects light and focuses it. If your goal is to see planets and stars, this is one of the best types of telescopes for that.
You won’t be able to see galaxies or other distant objects with it, but this instrument gets the job done.
Reflector
If you need a good budget telescope, you’ll want to go with a reflector model. It uses a mirror to spot objects rather than a normal lens.
This makes it good for seeing star colors, but if you want to do a little bird watching, this isn’t the telescope for you. It doesn’t handle land objects that well. You’ll also have to worry about dust gathering on the mirrors, and it tends to pick up a lot of condensation.
Catadioptric
Catadioptric telescopes use a mixture of lenses and mirrors. The close tube design prevents dirt and debris from gathering on the lens. They’re also the easiest telescope to carry around, and you’ll have a lot of versatility in what you can see with it.
There’s only one thing that you need to keep in mind before you go shopping for a catadioptric telescope. They’re a lot more expensive than your other options.
Finderscope
Now that you have your instrument in hand, it’s time to learn how to use it. The first thing that you need to familiarize yourself with is the finderscope.
It’s usually located on the side of the device. It covers a little bit more area than the telescope does itself. To adjust it, you’ll loosen the screws and point it so it’s facing the same direction as your main scope.
The best time to do this is during the day. Find some stationary object and point your scopes at it. Be careful not to bump your telescope at all when you’re done and don’t use the sun as your focus object.
Using Your Eyepiece
We recommend starting with a low-power eyepiece. Play around with the focus knob by turning it in both directions until you can see the object you’re looking at in complete clarity.
If you still don’t have the focus that you want, you can switch up to a high-powered eyepiece, or you can slip in a Barlow lens. You can use it along with the low-power eyepiece to extend its focus reach.
Choosing Your Telescope Mount
So, now that you know the basics of how to use a telescope, let’s talk about mounts. Believe it or not, the one you choose matters a lot.
Altazimuth Mount
Since you’re a beginner, you should consider going with an altazimuth mount. It easily adjusts up and down and side to side. They’re also a lot lighter than the equatorial mounts.
Equatorial Mount
Equatorial mounts are a little more complicated to use. These can move on a north-south and east-west axis. This allows them to track celestial objects in the sky.
Many of these mounts work off of a motor that you program using a computer. It’s cool when you get a little more used to using a telescope.
Additional Tips
Before we leave you with your telescope, we’ve got a few additional tips for you. Keep these things in mind to increase your stargazing experience.
Know What You’re Trying to Spot
Before you take your telescope into your yard, it’s a good idea to know what you’re trying to spot. This will help you adjust your lenses accordingly.
If you’re trying to look at planets, you’re going to need a sharp resolution, for example. If your goal is to look at distant galaxies, you should opt for a large aperture.
Less Is More When It Comes to Magnification
When it comes to adjusting lenses, magnification comes to mind. If you’re not careful, you’ll end up setting the bar a little too high, however, and not be able to see anything.
This being said, set your magnification in between 75-100 power. Anything more than that isn’t worth it.
Dress Warm
The thing about peering through a telescope is that you’ll be standing in a stationary position most of the night. Even if it’s warm out, you’ll most likely get a little chilly. So, we recommend always dressing warm before you go out stargazing.
Bring the Right Accessories
If you want to look at the moon, invest in a good polarizer. It will sharpen the contrast and allow you to get a better image. You should also invest in a dew shield.
This will do as the name suggests. It will stop condensation from gathering on the lens and obstructing your view.
How to Use Telescopes to Gaze at the Stars
There you have it! Learning how to use telescopes isn’t so hard. As long as you take the time to play around with the lenses and figure out how the device works, you’ll be able to see all the stars and planets that your heart desires.
Looking through a telescope is only one way to entertain yourself while you’re outside. Check out our blog daily for more ways to have fun.
Topics #how to use telescopes